

Microsoft Entra ID Setup for SAML
The following steps guide you through configuring SAML authentication with Microsoft Entra ID (Azure AD). Ensure you have the necessary permissions and access to the Azure portal.
Sign in to the Azure Portal
- Go to the Azure portal at https://portal.azure.com (opens new window).
- Log in using your credentials.
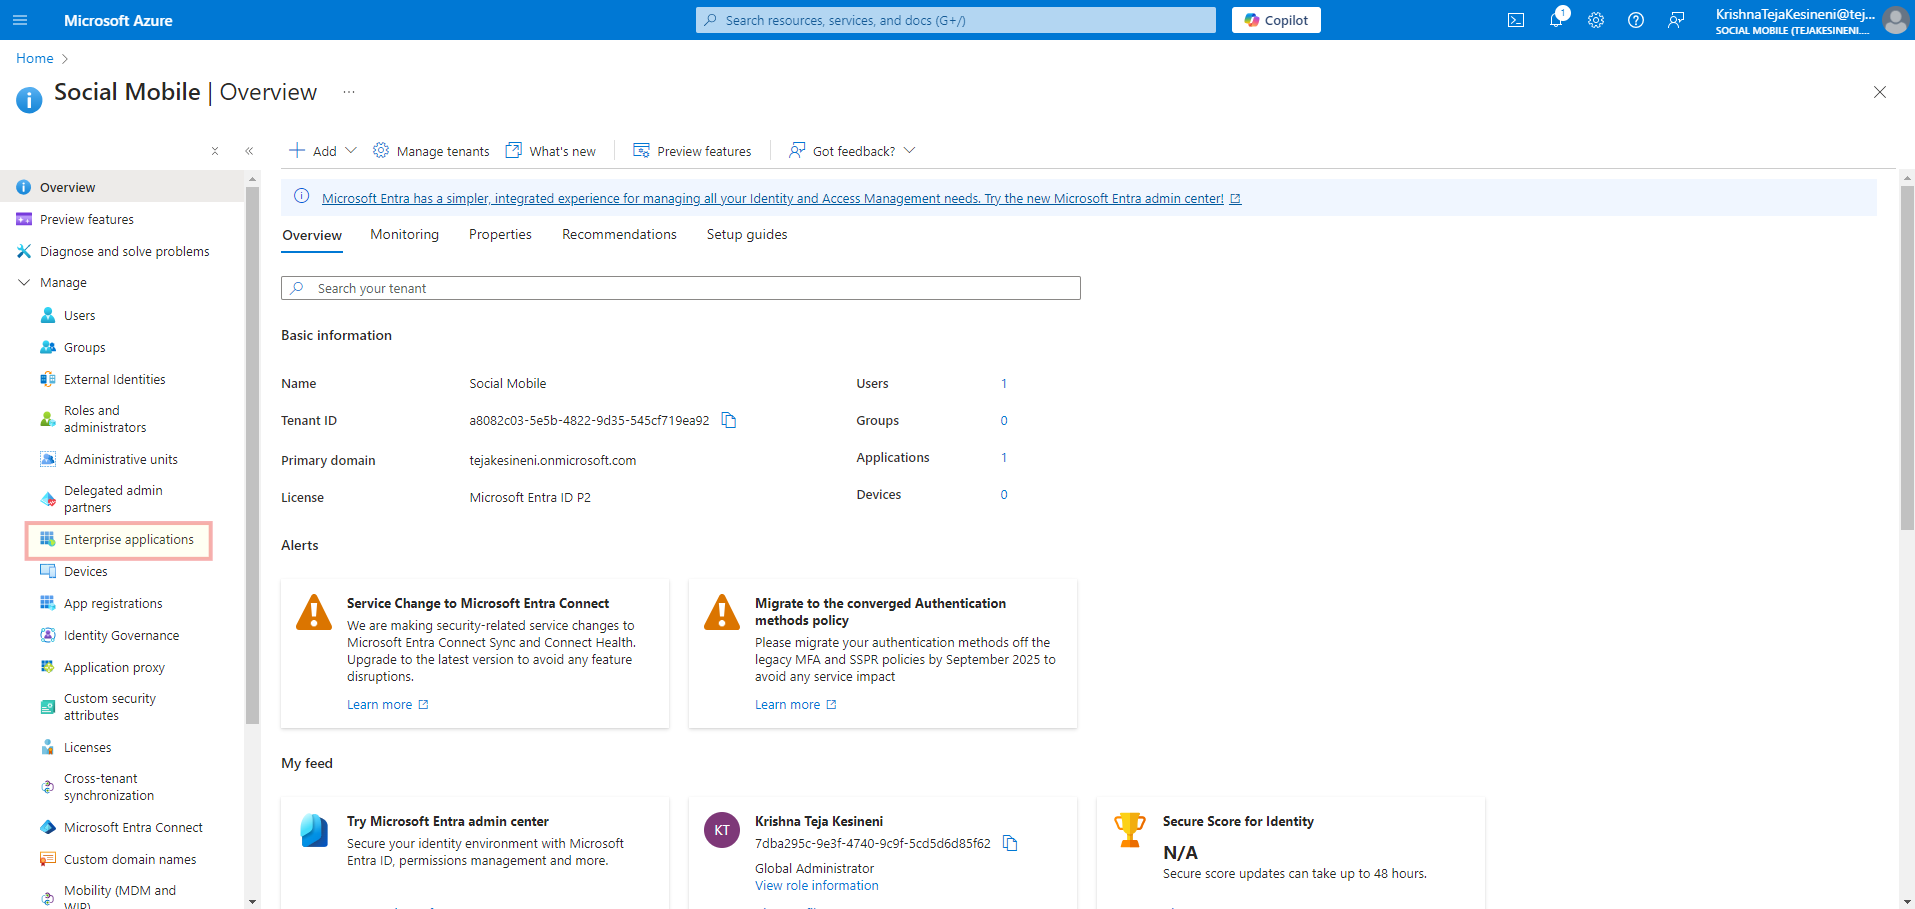
- Click on Microsoft Entra ID.
Create a New Application
In the Azure AD menu, select Enterprise applications under the Manage section.
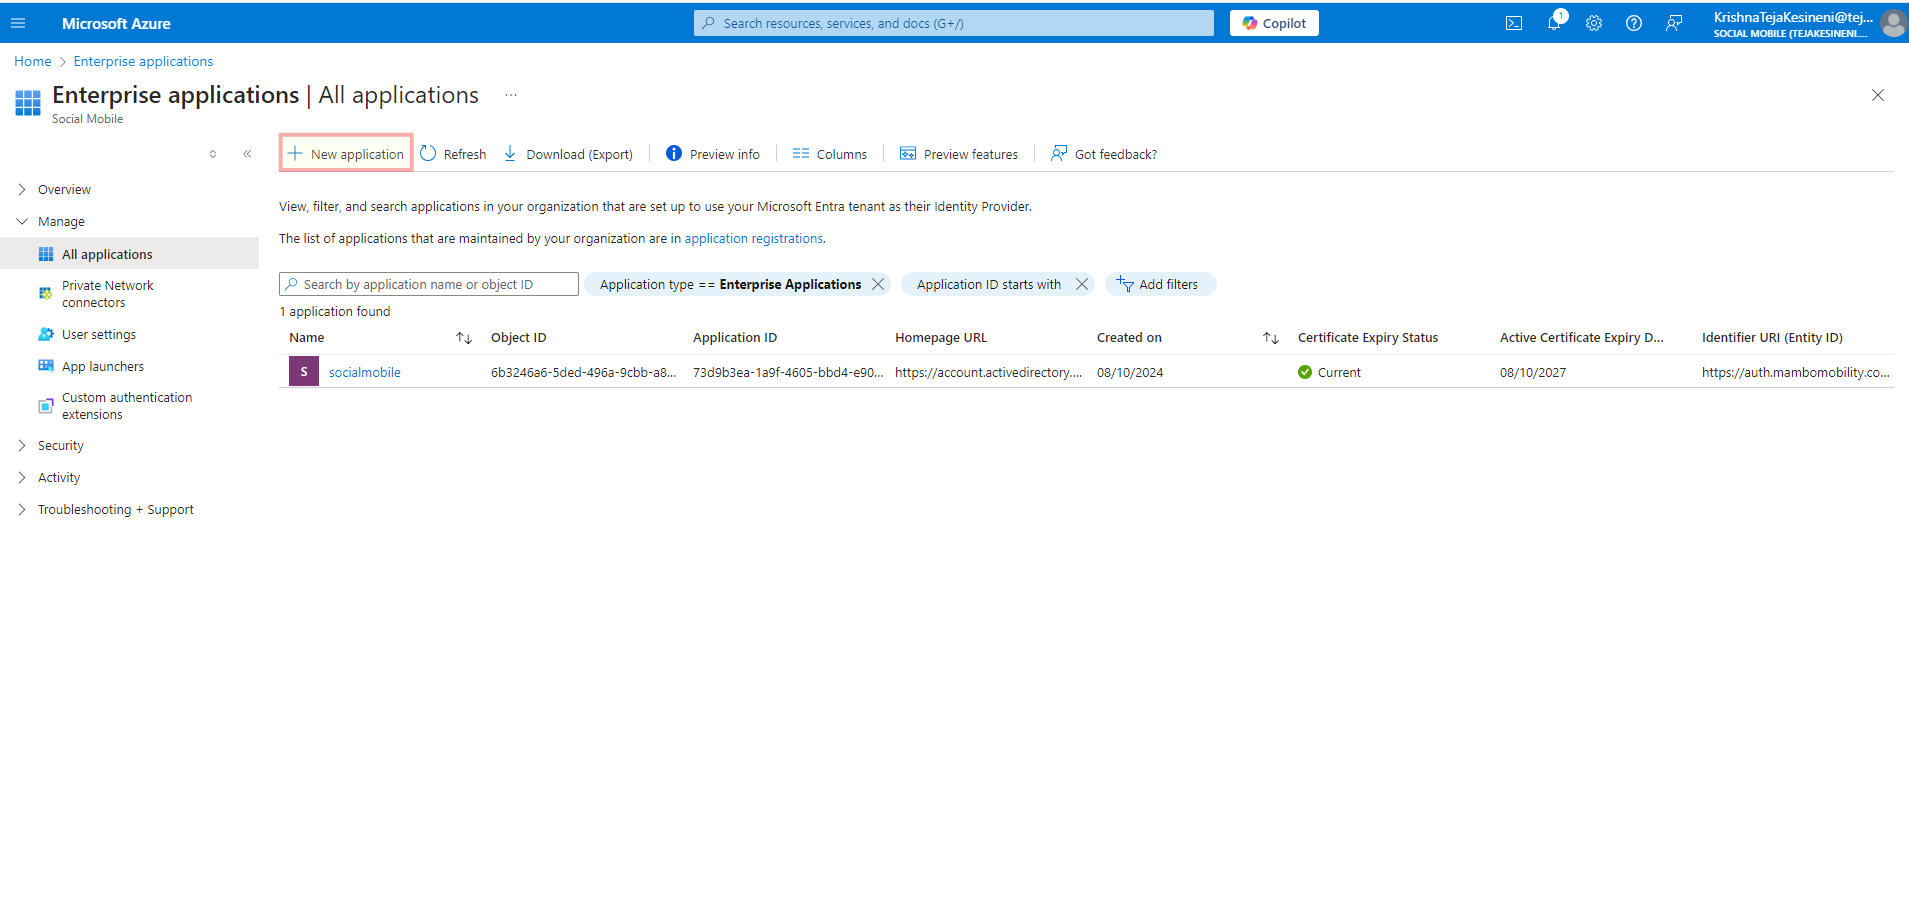
Click on the + New application button to add a new enterprise application.
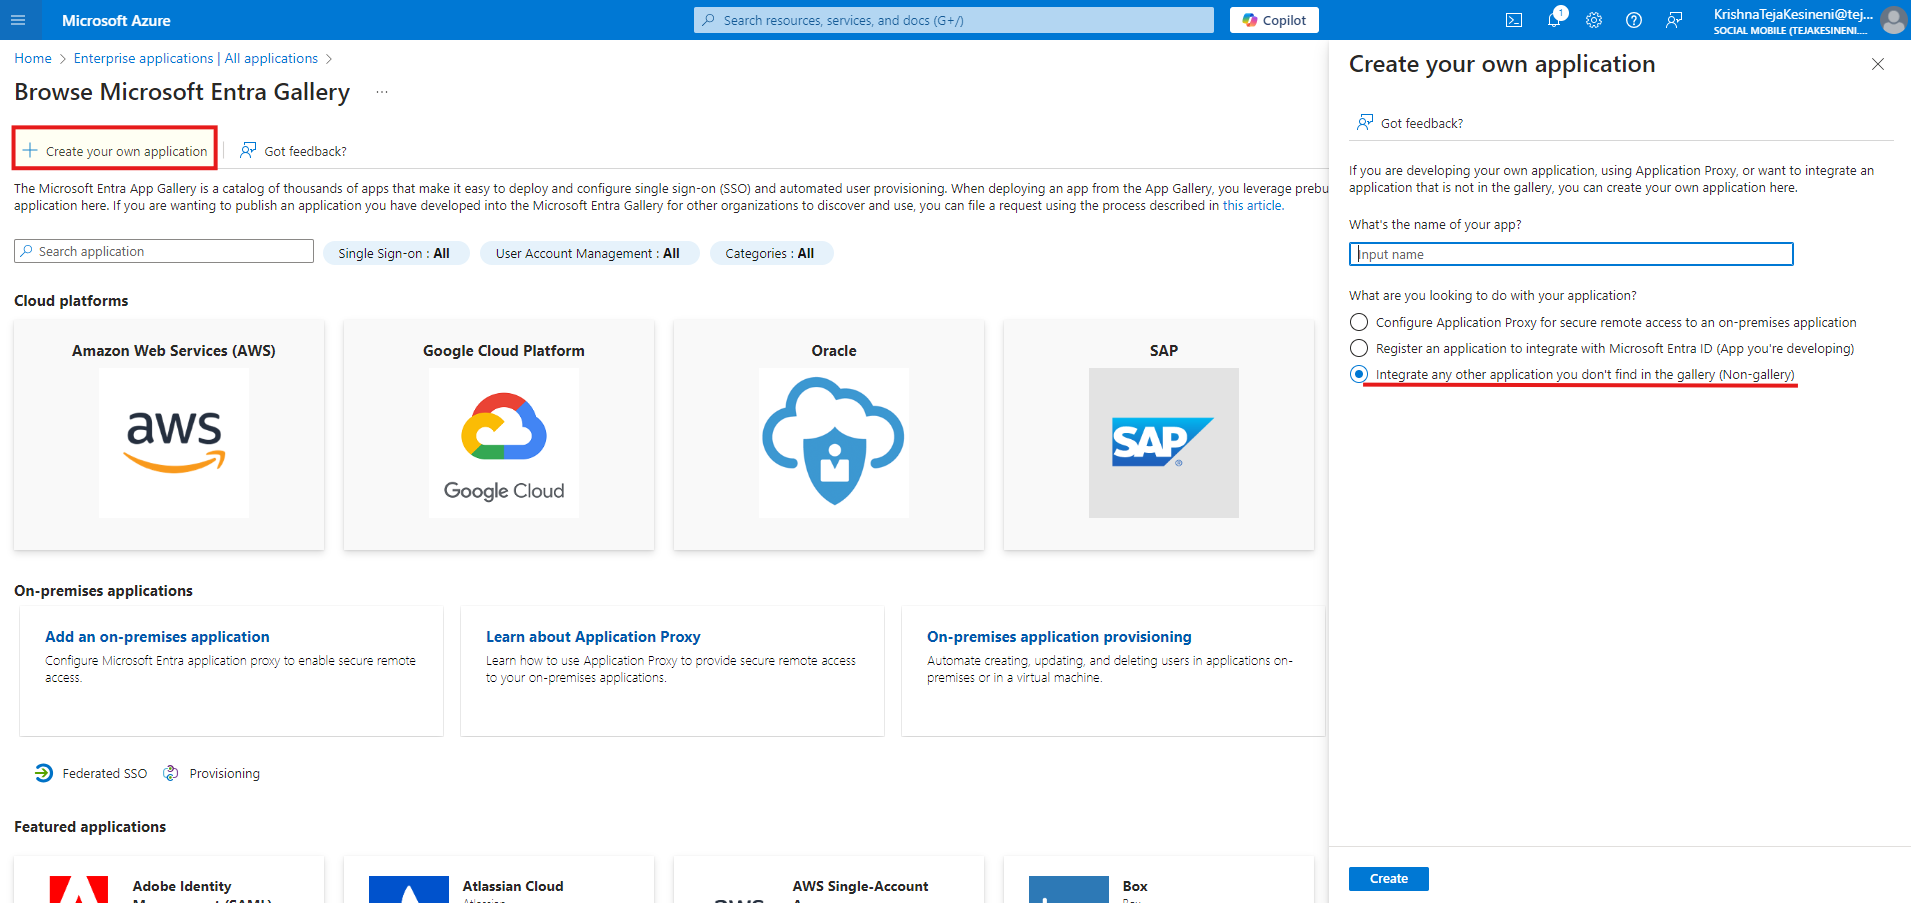
Click on + Create your own application, provide a name, and select Integrate any other application you don't find in the gallery (Non-gallery) and click on the create button.
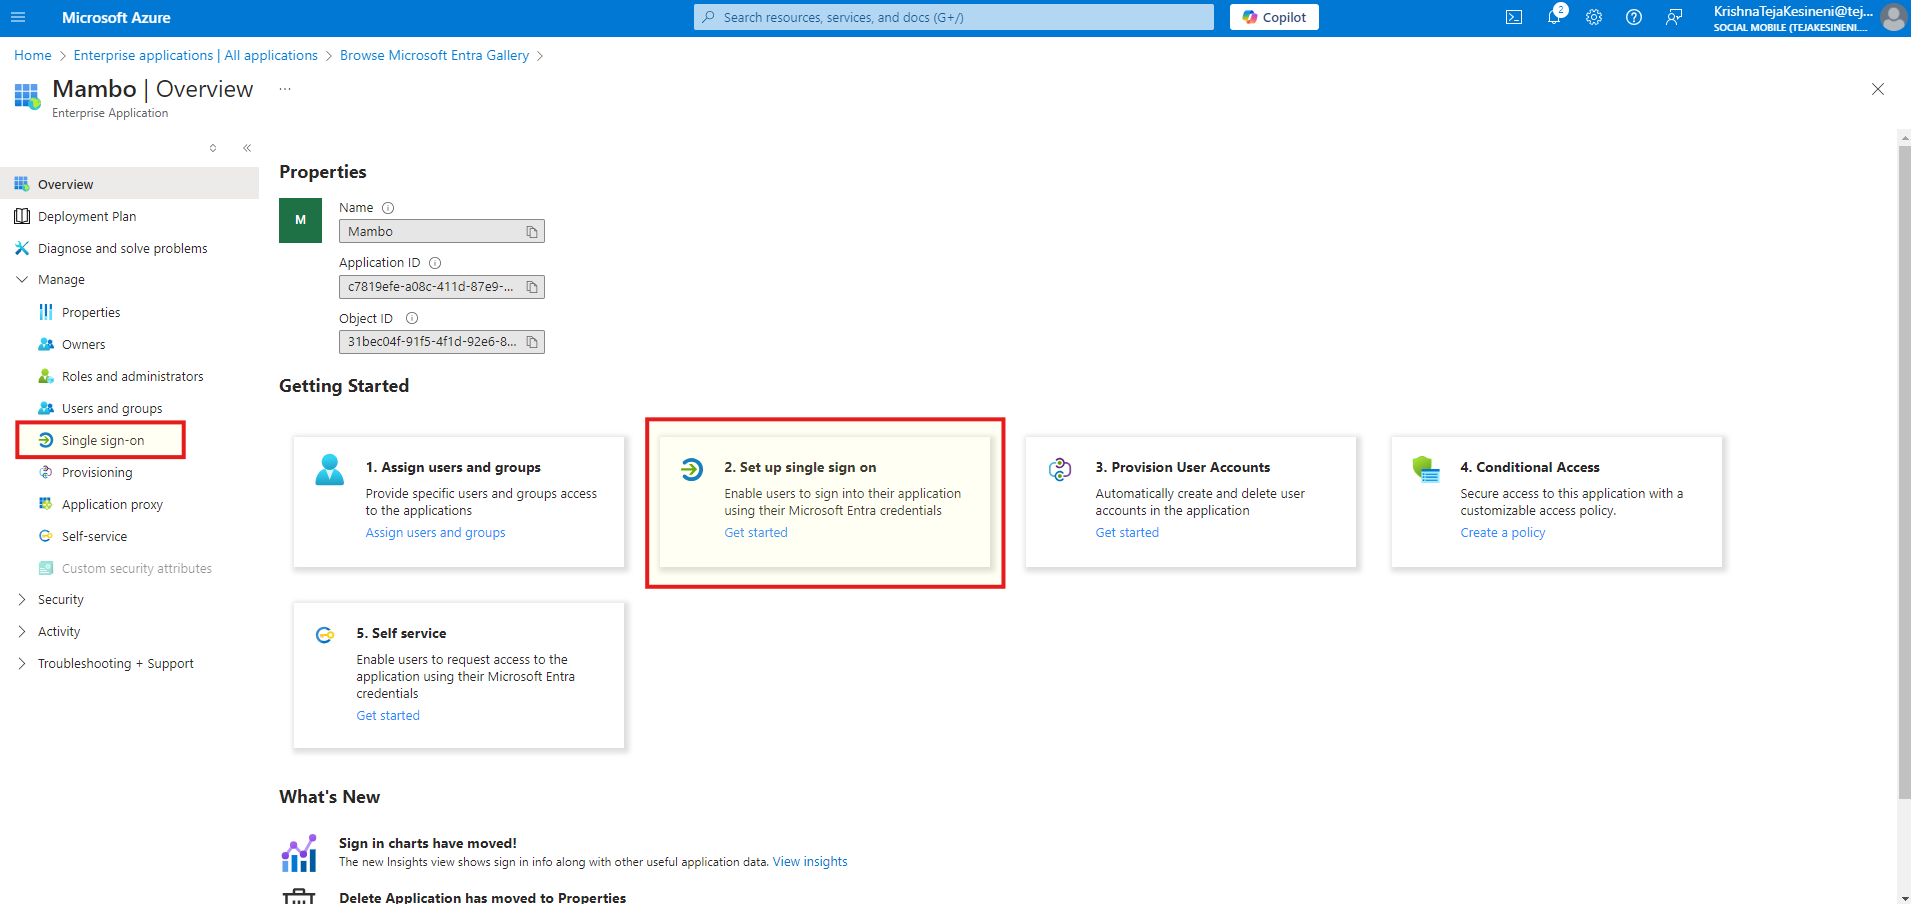
Configure Single Sign-On (SSO)
Click on Single Sign-On under Manage or select Set up single sign on card. And Select SAML option.
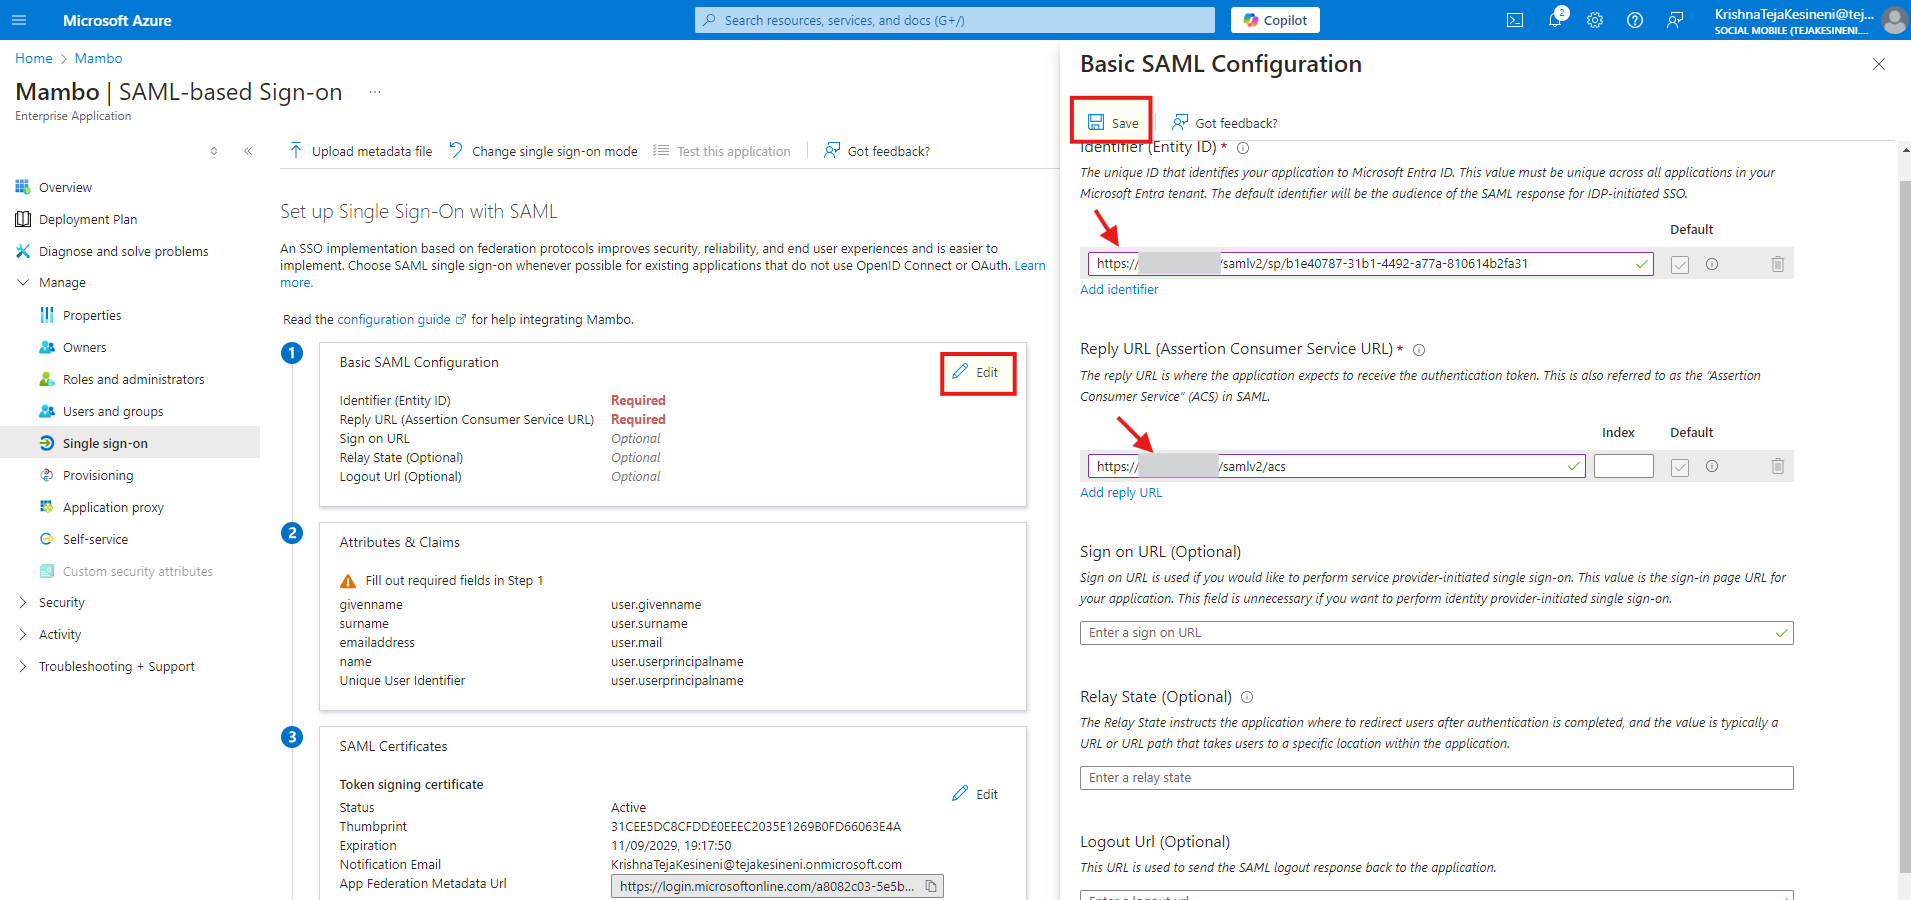
To configure SAML, get the details (Identifier and Reply URL (ACS)) from the from the mambo portal and enter same by editing the basic SAML configuration.
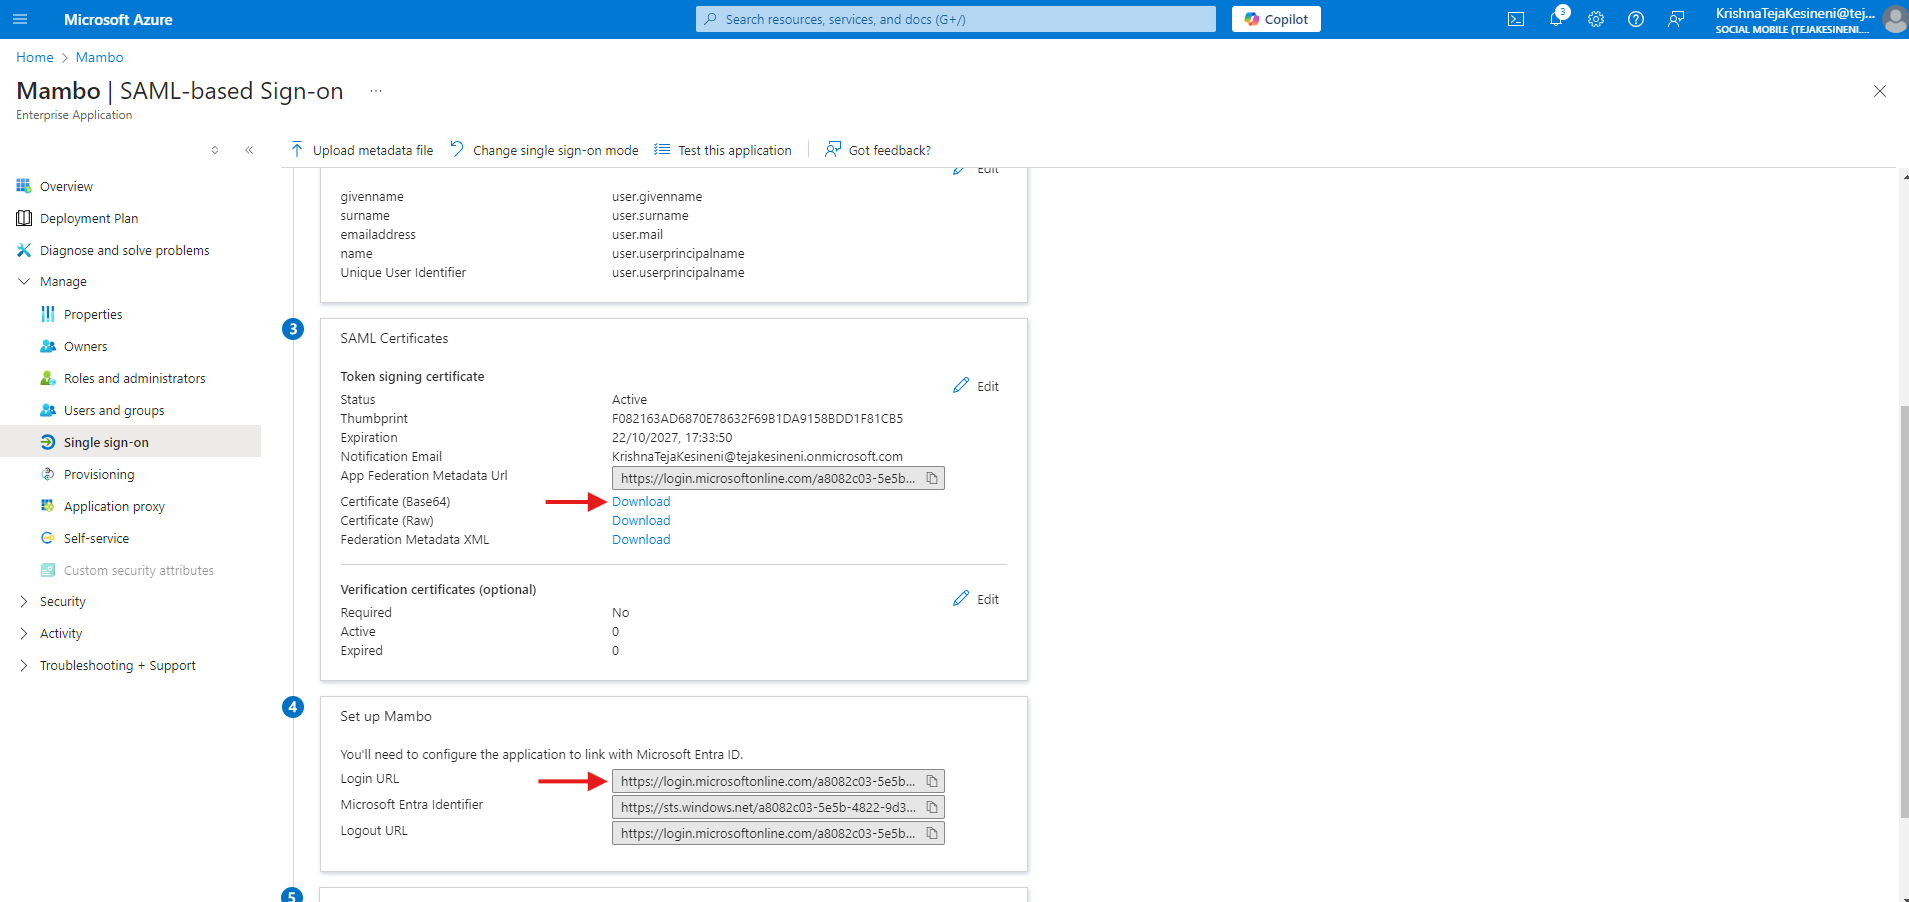
Download the Certificate(Base64) from the SAML Certificates section and copy Login URL from the Set up<project_name> section. These will be needed to complete the configuration on our mambo portal side.
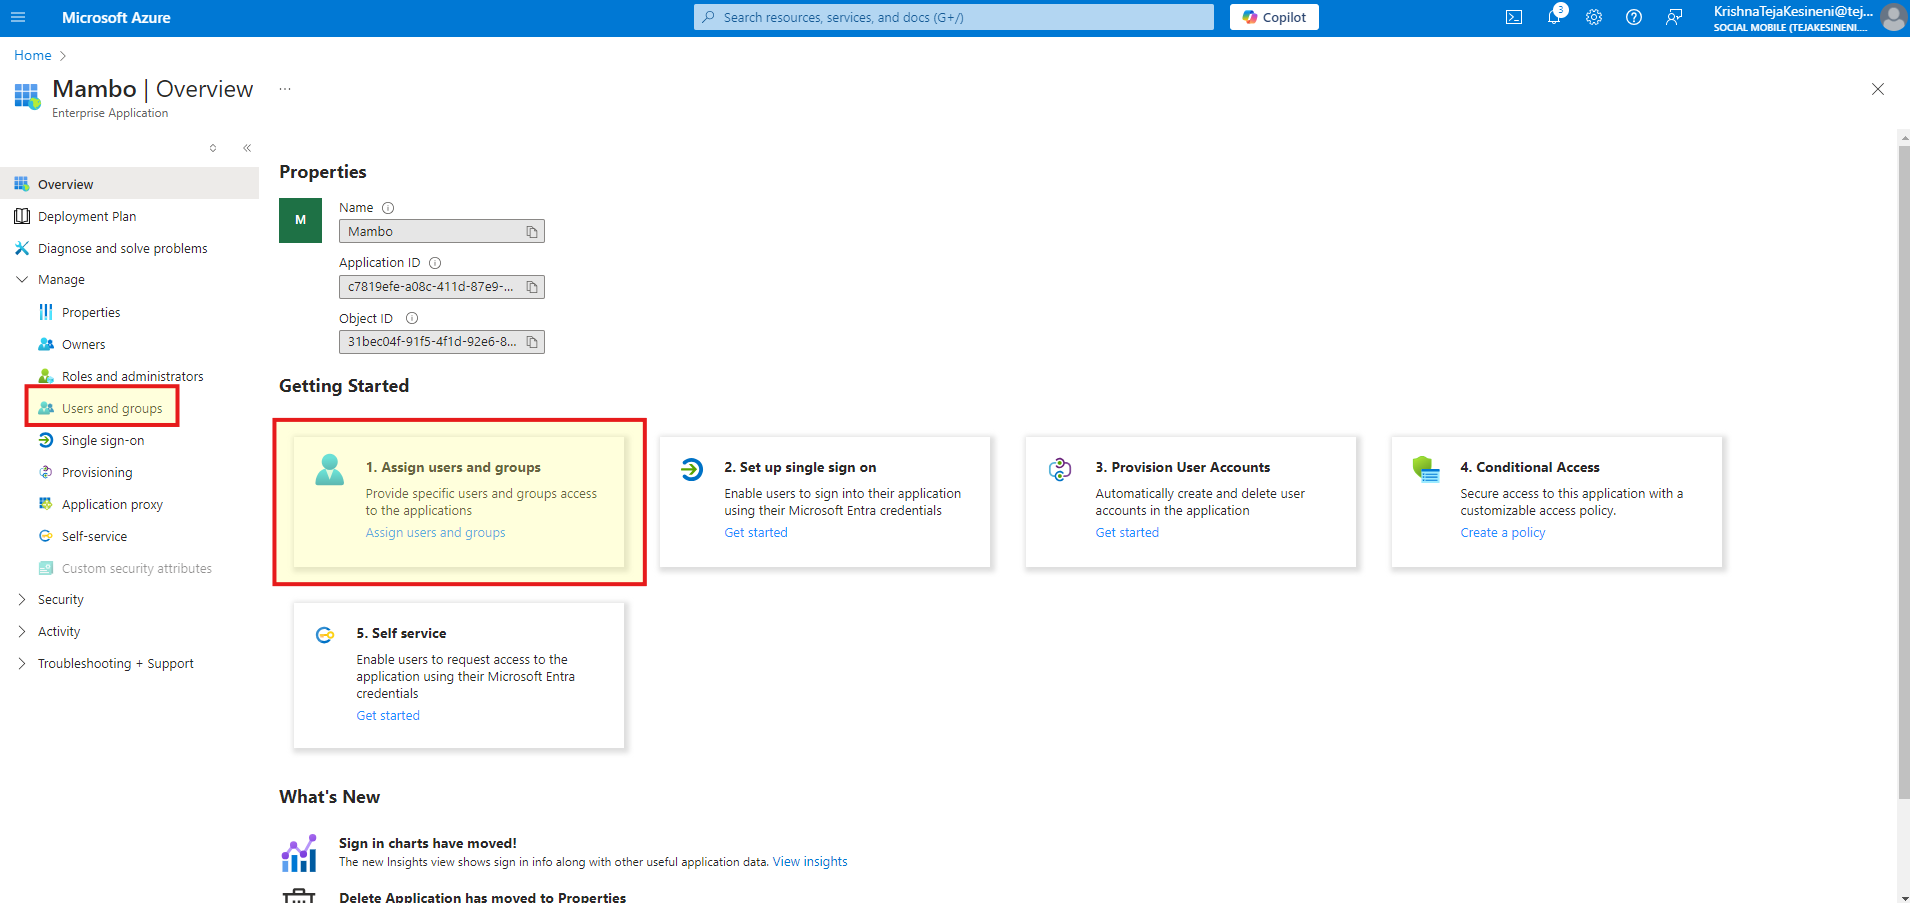
Assign Users to the Application
Make sure you assign the Required Users by selecting Users and groups under Manage or select Assign users and groups card.
Once the application is configured here, complete the integration by providing the SAML details in the Mambo portal.