

Create the QR enrolment token
Within your mambo EMM account, navigate to Management > Enrolment, then click Create Token.
Configure the following Enrolment Token settings:
- Name the Enrolment Token.
- The Group or Policy that you’d like to use.
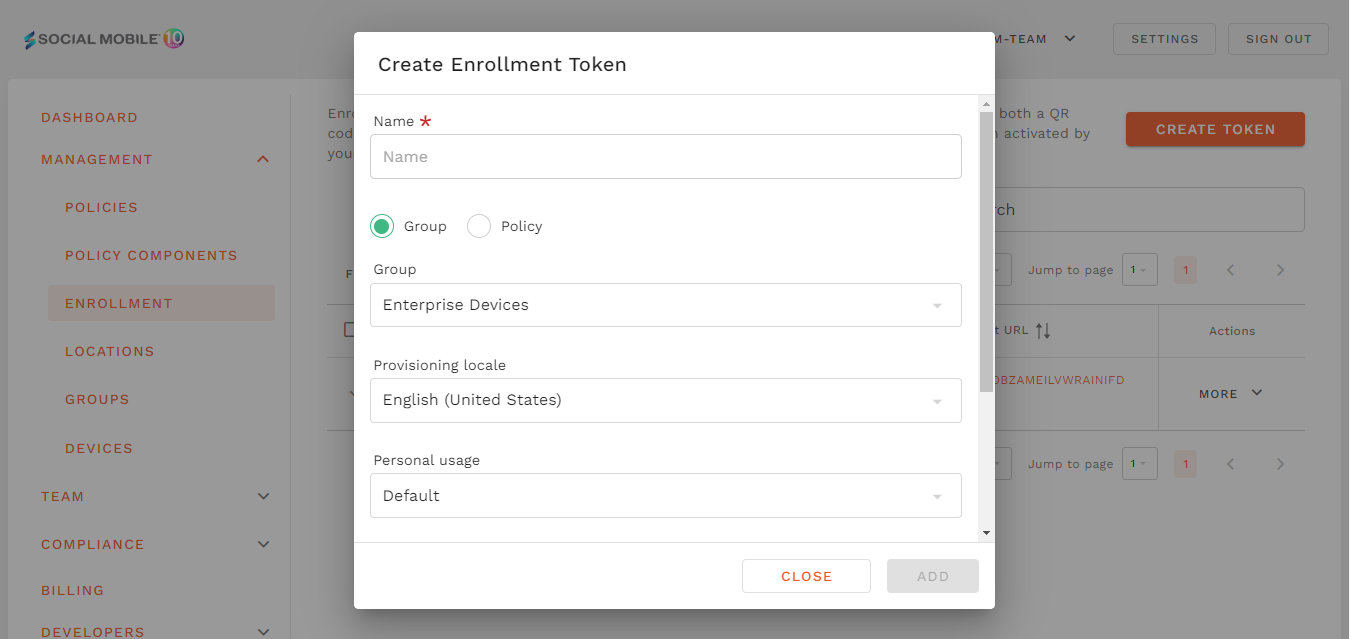
- If Group is selected, the policy associated group will be the policy installed on the device, and will automatically enrolled into that group.
- If Policy is selected the device will be enrolled directly into Default group.
- Select your Provisioning locale
- Optionally select the Wi-Fi Network you’d like to use, the list comes from your already configured networks in the Network Policy Components but you can also set a custom one.
- Select whether to Preserve System Apps, this will leave all installed apps from the factory intact, even apps commonly referred to as “bloatware".
- Select whether to Allow for personal use, if this option is checked, you will enable the device to be used for both work and personal use. Users of the device will be able to install third-party applications and may be able to do things that you cannot control. Only check this option if you are certain that you want to allow the device to be used for personal use. For dedicated or single-use devices, this setting should not be checked.
- Check One-time use if the Enrolment Token is intended for single-use.
- Check Use mobile data so the device can enrol and register over cellular data.
- You can optionally set an expiration for the token by checking Set an expiration for the token and adding an expiration time.
Click Add once you are finished and your enrolment token will be created.
To access the QR code you can select the Show details action of the desired enrolment token.
What's next?
- You can enrol a device using your newly created enrolment token